Introduction
The WiFi Wireless Gateway Pro (WiFi Gateway Pro) receives messages from the Wireless sensors and sends them to the JemRF Monitoring service. This eliminates the need for a Raspberry PI computer and all that extra overhead. The Gateway provides an easy to use tool to get your wireless sensors online free of configuring and programming a computer first.
The default option is to include an internal Temperature and Humidity Sensor for room reference.
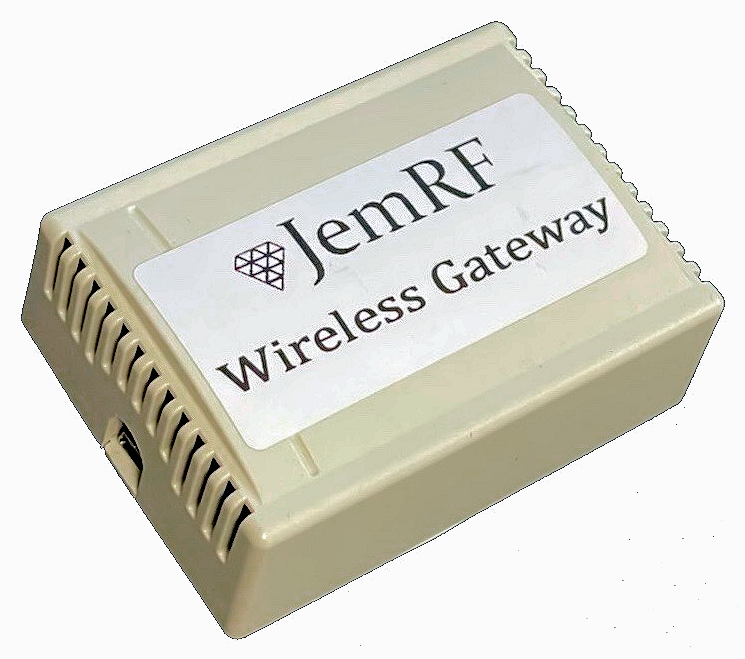
The WiFi Gateway Pro is in the same physical case as the current WiFi IoT Sensors.
- Follows the same setup process as our WiFi IoT Sensors to connect to the local 2.4G WiFi Only.
- It has option to send Celsius to Fahrenheit readings.
- Using a USB-C connector for power.
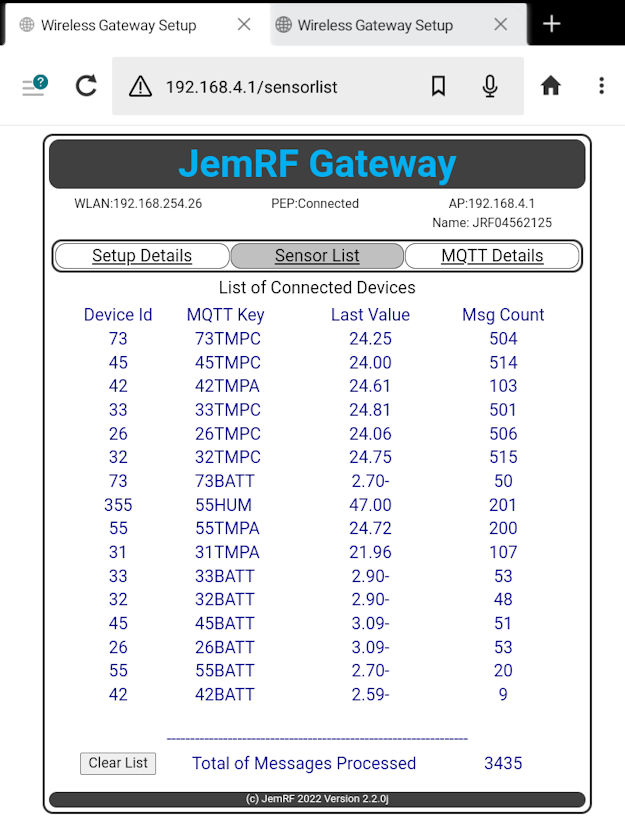
- It provides a Sensor List overview page to show all the sensors it is tracking and their last value.
- Supports RF4 Sensors, sensors with 4-character device IDs as well as the 2-character IDs.
Tech Specs
- Dimensions 74mm x 55mm x 28mm
- Powered either by USB-C.
- Upgrades are done over the air using the Update button or can be done manually done using a 3.3V FTDI cable
Features
- Easy to configure web interface. No programming or soldering skills required. You do not need the internet to configure the device. Connect to it directly from any WIFI device (e.g. PC, phone tablet…)
- Supports both Celsius or Fahrenheit temperature conversion
- Powered either by USB-C cable or battery connection (5.0 V) via the 2 pin battery connection plug
- The device supports dual WIFI mode allowing it to be WIFI access point and a WIFI client at the same time. A WIFI access point advertises itself through an SSID and can be connected to via any device or computer that has WIFI.
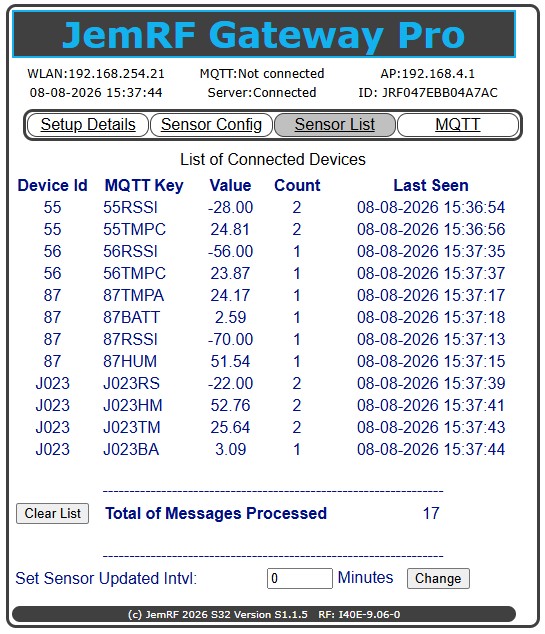
- The Sensor List tab will show sensor that the WiFi Relay and heard and forwarded to the server. See Example below:
Required, but not included:
- USB-C cable and USB power supply, 1 Amp or greater.
Setup Details
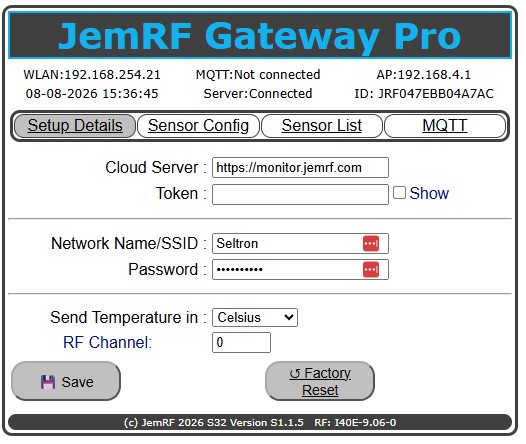
The configuration page for the WiFi Gateway Pro is very similar to the WiFi IoT Sensor. You can configure the Wireless Gateway Pro using any device that supports WiFi and an internet browser. In this example we will use a desktop computer.
Click here for the Details Setup Guide
MQTT Details
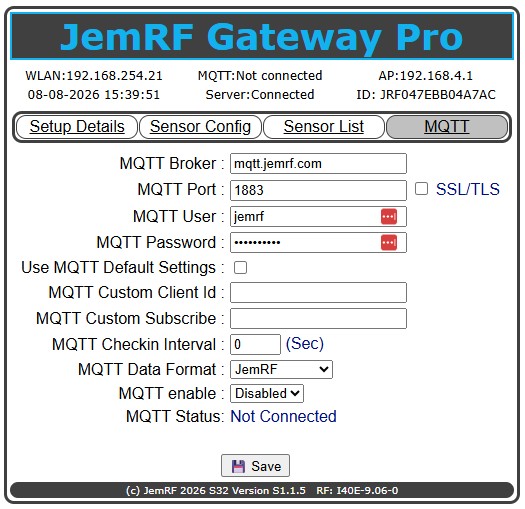
The MQTT Configuration page is used to set the connection to the MQTT broker, the port and if a secure connection is requested. The default topic starts with the Gateway ID show at the top right. There is options to change that topic and change the Gateway ID. For MQTT Auto Discovery there is the option to post CheckIn messages. There are three data formats the Gateway sends MQTT Messages.
- Using the JemRF data format, i.e. the MQTT Key as seen on the Sensor List with value.
- Using a JSON message format. i.e. the MQTT Key, value and message type [Temperature, Humidity, State,…]
- Home Assistant MQTT Auto Discovery which updates the Home Assistant topics with sensor descriptions and post data using the JemRF format.
Click here for details on the JemRF MQTT format with examples
Sensor Setup
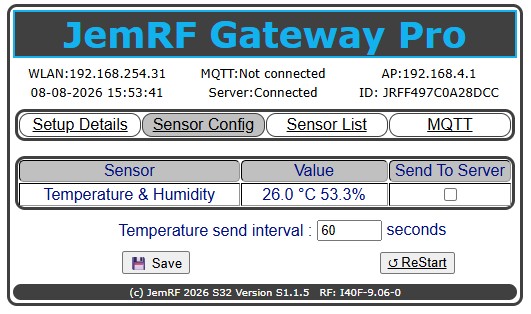
The sensor configuration page will show the current values for internal Temperature and Humidity Sensor. You can select to have the sensor readings to be sent to the Monitoring Server and/or MQTT Broker. The Temperature send interval is how often the readings are updated to the remote servers. There is a sensor Restart Option.
Sensor List
The Sensor List is all the RF Sensors the Gateway hears. The display shows the sensor ID the message types which are the MQTT keys, the last value how many times the Gateway has heard messages from each sensor and the timestamp for the last message received.
Firmware Updates
The current Gateway Version Pro is displayed at the bottom of each page. The firmware of the RF Transceiver is also show with the channel the Gateway is on. The default channel is zero (0).
The Gateway is updated from the Internet. When a new update is available a message will appear on the Setup Details Page.
Click here for Illustrated guide on updating the Gateway
Mounting Instructions
Mount the Gateway in a vertical position with the USB connector down. There is a mounting hold on the back for this. Do not mount against a metal wall as that can block the WiFi and RF signals.