Sensor List
The Sensor List page shows the last messages received from each sensor for which the Gateway is processing data. It includes the Sensor ID, the raw message type received, and the value associated with that message. The Message Count shows how many messages of that type from that sensor have been received. The timestamp shows the time the last message was received.
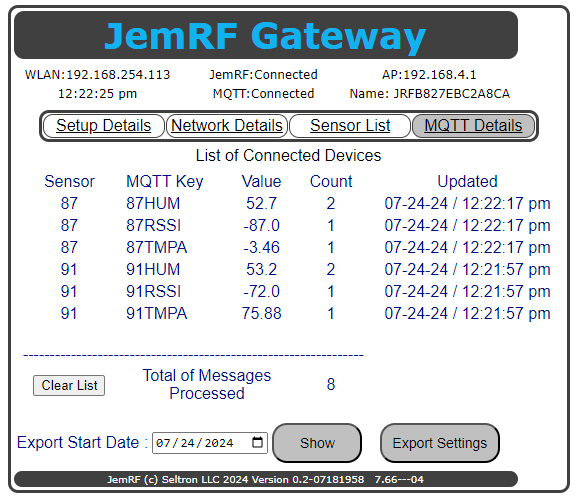 Figure 1 The Sensor List screen.
While there is not a hard limit on how many sensors a Gateway can track, there are possible issues with more that 32 sensors that could effect performance and data integrity based on how often the sensors update, their battery level and their distance from the Gateway.
List Show details for the day
To see sensor details locally of messages received by the Gateway, option at the bottom of the Sensor List page to show the sensor information captured on a specific date. The Show command will show the last 30 messages received in the Export format. The screenshot shows the bottom of the 30 messages and the option to Export that day’s report. The Export button will use the Start Date and export of all the messages received for that date to a CSV file with the date as the file name. The export will start at midnight local time and based on the time zone in the Network Settings. The is also an option to set the delimiter used in the CSV output file. The default is a comma (,).
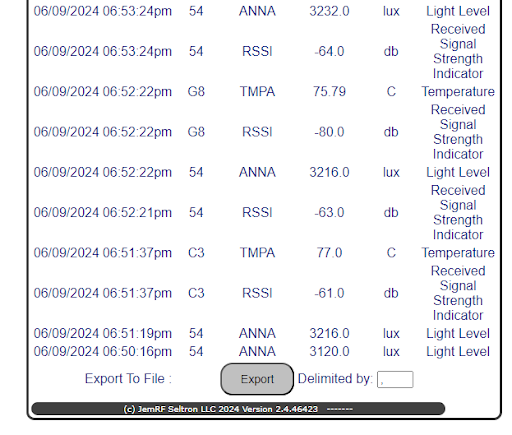 Figure 2 Bottom of the Sensor Show screen.
List Export Details
The daily sensor list can be a scheduled export. The Export Settings button will bring up the page shown below.
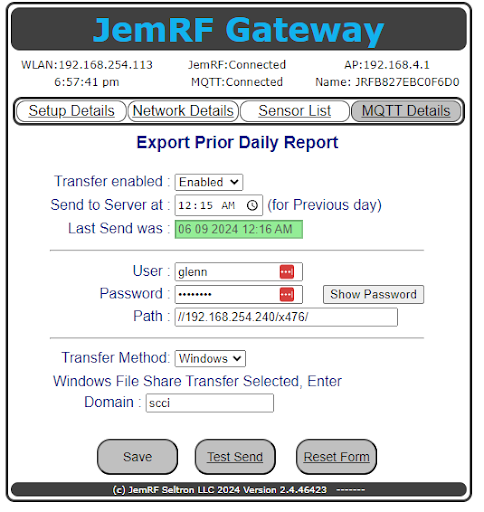 Figure 3 Export Prior Daily Report.
The Export options are:
There are three sections to the Export Daily Report.
- The top section is Enable Export at the selected time, with the status of the date and time of the last Export. The color Green indicates that the last export was successful.
- The center section is for credentials needed to connect to a remote server to export the logs.
- The bottom section allows for the selection of the Transfer Method. There are two export methods:
- The first method, shown in Figure 3, uses a Windows file server with the additional fields needed to connect to a Windows Server.
- The second method, shown in Figure 4, uses a Secure File Transfer protocol (SFTP), which is useful if the remote server is not located locally.
At the bottom of the page is the option to Save the Settings, Test the Saved Settings, this will immediately export the logs for the current day and Reset Form clearing all settings.
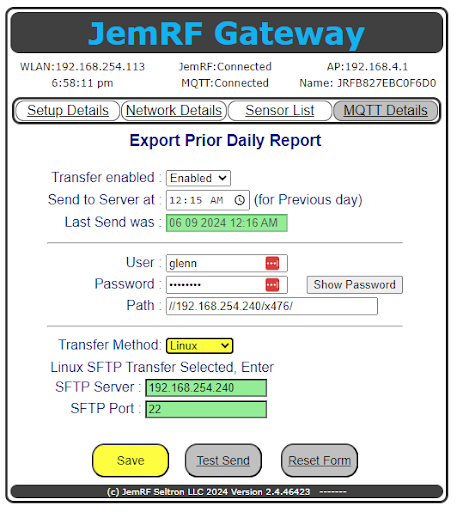 Figure 4 Export using SFTP protocol.
Figure 4 show the additional fields for the SFTP export option. It also shows an example in yellow of a change that was entered and not yet saved.