Interfacing with Adafruit IO
Adafruit IO has a very user friendly, and intuitive interface and is well documented which makes getting started and building dashboards very easy. And quick!
Background
In this section we will have a general overview of how Adafruit IO works and in the next section we’ll explain how to connect the JemRF sensors.
STEP 1 - CREATE AN ADAFRUIT IO ACCOUNT
Go to io.adafruit.com and register using an email address, username and password. You will need the AIO Key for authentication. Use the “View AIO Key” option from the main menu of io.adafruit.com to view or generate a new key.
You are now ready to start sending data to the io.adafruit.com.
STEP 2 - SEND DATA TO ADAFRUIT IO
Example Python code to send data to io.adafruit.com:
Here are many examples how to send data using Python, and we have our own example in the “Interfacing with JemRF Sensors” section below.
https://github.com/adafruit/Adafruit_IO_Python/tree/master/examples/basics
Select the “Feeds” menu option and you will see a new feed has been created as shown below:
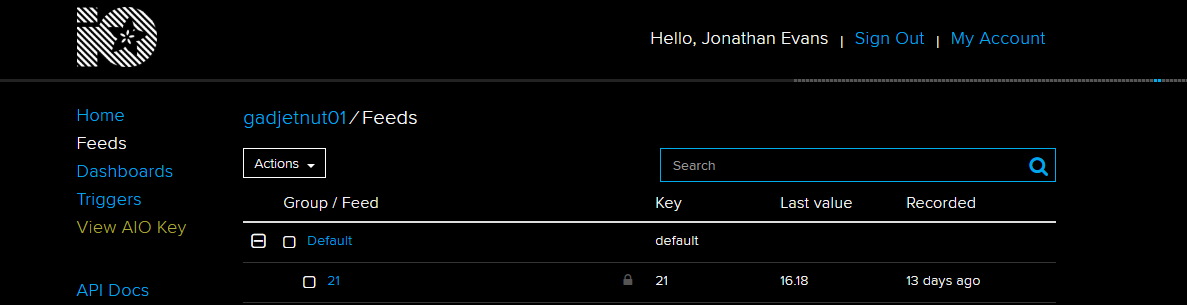
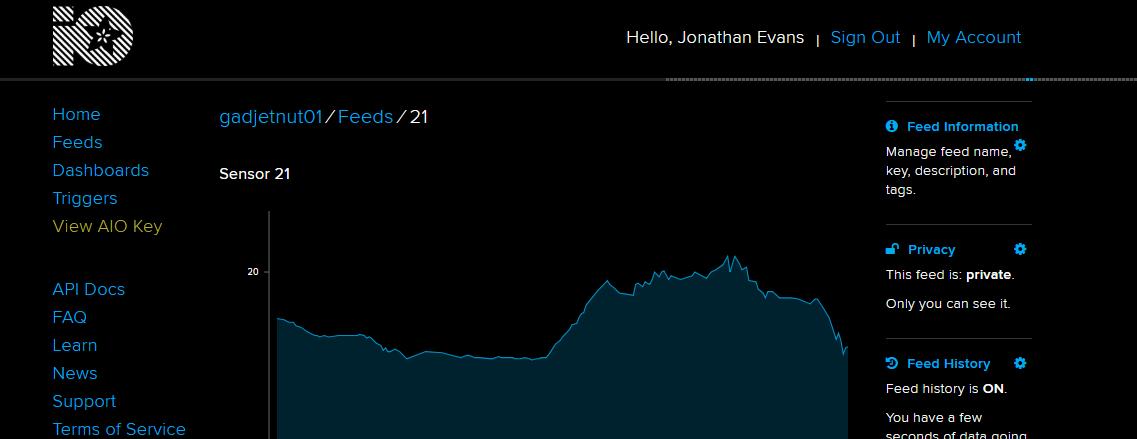
Click on the feed and you will see some historical data in a graph and data table.
STEP 4 - CREATE A VISUALIZATION
Select menu option “Dashboard”, click on the “Actions” button and select “Create new dashboard”. Enter a name for your dashboard.
Adafruit IO dashboards use “Blocks” to visualize the data. Click the blue + to create a new block and then select the type of block you want for your sensor.
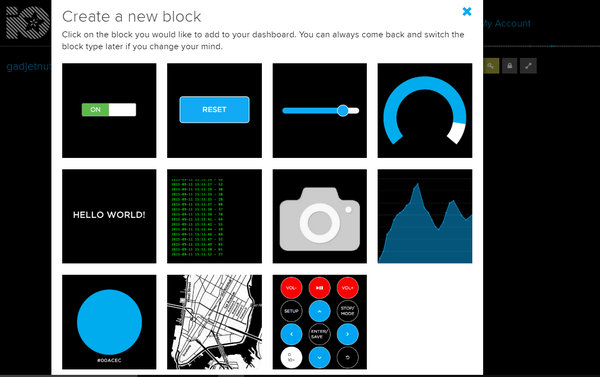
At the time this tutorial was written the above are the various blocks available for your dashboard. It is likely that over time this will get updated. Select the block you want and then follow the next couple of screens to link the block to the data feed and configure some settings for the block. You can create multiple blocks for the same data feed so this allows you to display the current value on a gage and the historical data on a graph or table.
Adafruit IO conveniently allows you to manually add and delete your data, and download the data from a feed using the button for it when you are viewing a feed. A really cool feature we like is the data stream indicator at the top of the screen You probably won’t notice it at first but once you start sending data to adafruit.io you will see a bunch of gray dots in a line separating the web page header from the body of the web page. Every time you send data to adafruit.io then you see a blue dot appear. Over time you will see the dots scroll to the left which gives you a very effective time line of data being sent. Another cool feature is the error monitor that you can use to monitor any errors. Interfacing JemRF sensors with Adafruit IO
The JemRF Adafruit IO interface example can be found at:
https://github.com/JemRF/rf_tools.git
JemRF Tutorial for Raspberry Pi
What you will need
- Any model Raspberry Pi with preferably the full Raspbian distro
- IoT Gateway for Raspberry Pi or Flex RF Module
- Any wireless sensor
What you need to know beforehand
- How to operate a Raspberry Pi
- You have already set up your IoT Gateway and tested your sensor
- Some Python programming knowledge is preferable but not mandatory as we provide you with the source code
- You can review the Adafruit IO Python Github page documentation here.
STEP 1 - DOWNLOAD THE JEMRF SAMPLE INTERFACE CODE
Open up a terminal session on your Raspberry Pi and download the JemRF Adafruit IO library from github:
git clone https://github.com/JemRF/rf_tools.git

cd rf_tools

sudo nano rf2adafruitio.py
STEP 2 - INSERT YOUR AIO KEY
- Page down and insert your AIO Key and Username in between the single quotes, as shown in red below.
# Set to your Adafruit IO key.
# Remember, your key is a secret,
# so make sure not to publish it when you publish this code!
ADAFRUIT_IO_KEY = 'insert your key here'

# Set to your Adafruit IO username.
# (go to https://accounts.adafruit.com to find your username)
ADAFRUIT_IO_USERNAME = 'insert your username here'
- Press ctrl-x and then y to save and exit.
STEP 3 - INSTALL ADAFRUIT IO LIBRARY
sudo pip install adafruit-io
STEP 4 - RUN THE SAMPLE INTERFACE
- Type the following to run the application:
python rf2adafruitio.py
You will see output being sent to the screen when RF signals are processed:
pi@raspberrypi:~/Adafruit-IO $ python rf2adafruitio.py
Tue Sep 15 18:27:18 2020 78HUM43.45-
Processing data : Feed=rf78hum,Value=43.45
Creating new feed
Tue Sep 15 18:27:20 2020 78TMPA29.34
Processing data : Feed=rf78tmpa,Value=29.34
Creating new feed
Tue Sep 15 18:28:01 2020 78HUM40.72-
Processing data : Feed=rf78hum,Value=40.72
Tue Sep 15 18:28:02 2020 78TMPA30.32
Processing data : Feed=rf78tmpa,Value=30.32
Tue Sep 15 18:31:33 2020 07HUM52.21-
Processing data : Feed=rf07hum,Value=52.21
- Now log in to your Adafruit IO account and check that the feeds have been created. Follow the Adafruit tutorials for how to create dashboards from the data feeds.