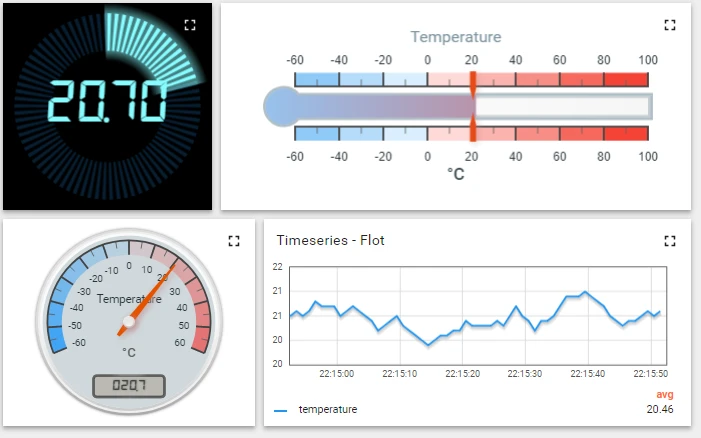
Example dashboard:
Description
ThingsBoard is an IoT platform that can do data visualization but also has a rules engine so you can raise alarms and create alerts. We will focus on mainly the data visualization aspects of ThingsBoard in this tutorial.
ThingsBoard is an open-source platform that can be downloaded to your computer, or run from their online service thingsboard.io.
They have some of the best dashboard widgets we’ve seen so you can create visually appealing dashboards in high resolution.
We have tested ThingsBoard on a Raspberry Pi and find it works well, other than it takes few minutes to initially start the TingsBoard service. After it has started we found it very responsive and well suited to this platform.
Installing ThingsBoard on Raspberry Pi
In this tutorial we will install ThingsBoard on the same Raspberry Pi where you have installed a wireless base station.
You can find the ThingsBoard documentation for installation on Raspberry Pi here:
https://thingsboard.io/docs/user-guide/install/rpi/
Make sure you have the full version of Raspberry Pi Raspbian distro installed (not the light version), because ThingsBoard needs Java (which is not installed on the light version). To get up and running quickly I would suggest you skip the Postgres database install and go with the standard internal database shipped with ThingsBoard.
Open up a terminal window on your Raspberry Pi and start by checking your Java version by typing:
java -version
which will return something like this:
java version "1.8.0_65"
Java(TM) SE Runtime Environment (build 1.8.0_65-b17)
Java HotSpot(TM) Client VM (build 25.65-b01, mixed mode)
Any version greater than 1.8 is fine.
Next download and install the package using the next four commands:
wget https://github.com/thingsboard/thingsboard/releases/download/v1.4/thingsboard-1.4.deb

sudo dpkg -i thingsboard-1.4.deb

export JAVA_OPTS="$JAVA_OPTS -Dplatform=rpi -Xms256M -Xmx256M"

sudo /usr/share/thingsboard/bin/install/install.sh --loadDemo
Then start the service by typing:
sudo service thingsboard start
It will take about 5 minutes to start. You can open a browser and browse to the IP address of your Raspberry Pi on port 8080. E.g. http://192.168.2.19:8080
Once the service has started you will see a login panel like this:
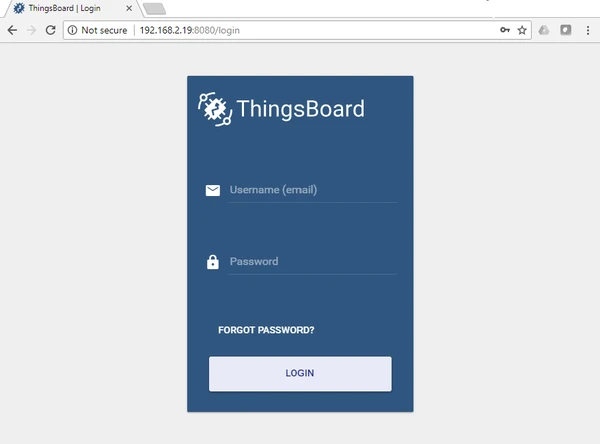
The default user and password is: login - sysadmin@thingsboard.org. password - sysadmin. Add your own account by clicking on Tennants, then click on the blank Tanant and click on Manage Tenant Admin and then add a new user.
Interfacing RF Sensors with ThingsBoard using Node.js
Our ThingsBoard interface examples can be found at:
https://github.com/JemRF/ThingsBoard
Raspberry Pi Node.js Tutorial
What you will need
- Any model Raspberry Pi with preferably the full Raspbian distro
- IoT Gateway for Raspberry Pi or Flex RF Module
- Any wireless sensor
What you need to know beforehand
- How to operate a Raspberry Pi
- You have already set up your IoT Gateway and tested your sensor
- Some JavaScript programming knowledge is preferable but not mandatory as we provide you with the source code
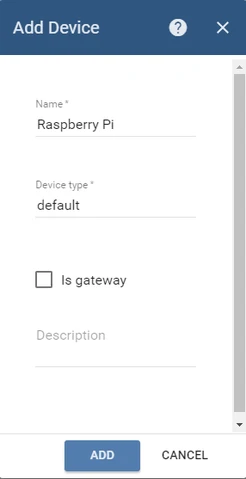
Step 1 : Login into the ThingsBoard website on your Raspberry Pi and create a new device and enter a new device name.
Select your new device and copy the access token for this device:
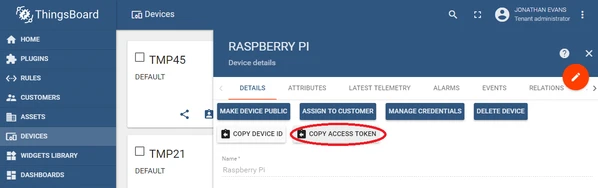
Step 2 : Obtain a token
Open up a terminal session on your Raspberry Pi and download the JemRF ThnigsBoard library from github:
git clone https://github.com/JemRF/ThingsBoard

cd ThingsBoard
Step 3 : Enter the token into the test tool application
Edit the test tool:
sudo nano demo-tool.js
Paste the token into the code:
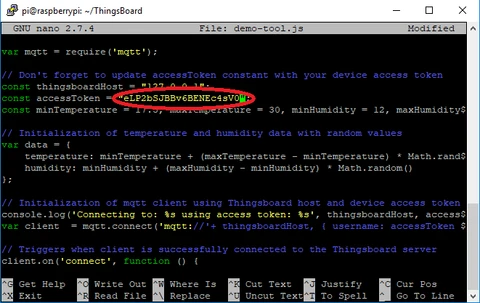
Press ctrl-x and enter to save.
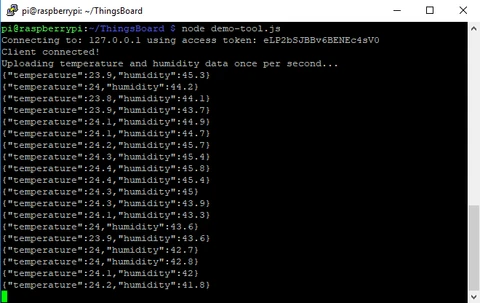
Step 4 : Run the test tool
Type the following:
node demo-tool.js
The test tool should connect to your local instance of ThingsBoard (on 127.0.0.1) and send random temperature and humidity sensor readings.
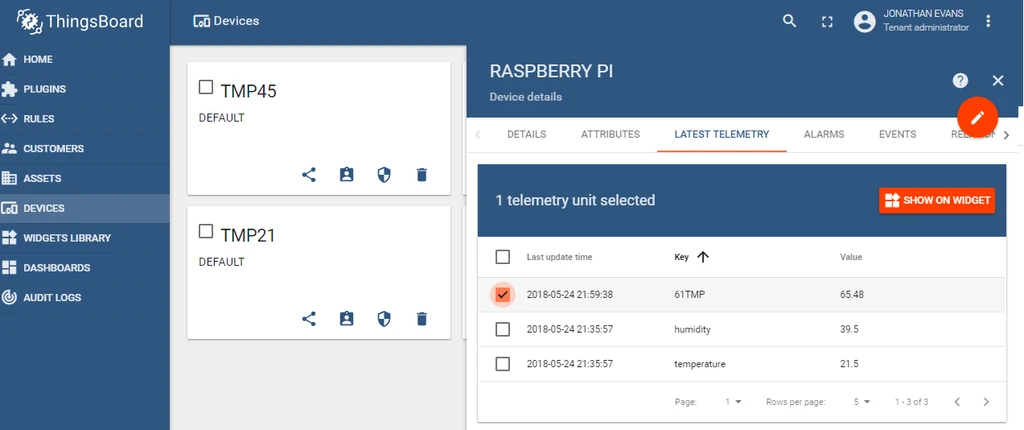
Step 5 : Verify data is being transmitted to Thigsboard
Click on the Latest Telemetry tab of your Raspberry Pi device in ThingsBoard and you should see the latest data as shown below.

Interfacing JemRF Sensor with Thingsboard
The IoT Gateway for Rapsberry Pi uses the serial port to interface. Since this is a Node.js tutorial we will be using the SerialPort library. Install this by typing:
Step 1 : Install the serialport node library
npm install serialport
We have supplied two sample interface applications. The one named serial.js will send all sensor readings to one ThingsBoard device. The other application (serial2.js) will send reading from RF sensors to unique ThingsBoard devices. We will be using serial.js in this tutorial because it’s the easiest way to interface and you won’t need to create individual devices in ThingsBoard for all your RF Sensors.
Step 2 : Enter your access token in serial.js
Edit serial.js:
sudo nano serial.js
Press ctrl-x and then enter to exit and save.
Step 3 : Run the application
Type the following:
node serial.js
All wireless messages will get printed to the screen like this:
61AWAKE---

61TMPA18.60
{'61TMP':65.48}
Connecting to: 127.0.0.1 using access token: eLP2bSJBBv6BENEc4sV0

61SLEEPING-
{'61SLEEPING':}
Connecting to: 127.0.0.1 using access token: eLP2bSJBBv6BENEc4sV0
Step 4 : Verify the data is being sent to Thingsboard
Go back to the Latest Telemetry for the RaspberryPi ThingsBoard device and you should see your RF sensor readings start to appear.
Creating dashboards is a fairly trivial task. Select the Latest Telemetry tab and select the check box next to the sensor you want to ad to the dashboard and then click the Show on Widget button.
Select the type of gage you want to use and click add to dashboard. You will then be prompted to either create a new dashboard or add to an existing dashboard.

Here are some examples of different widgets you can choose. There is quite an extensive list of options you can choose from.