Description
How to connect to the Community Edition of ThingsBoard using the MQTT feature and JSON data format of our WiFi Sensor or WiFi RF Gateway .
Step 1 Power up the WiFi Device and connect to is WiFi
First power up the WiFi Sensor or WiFi Gateway. It will create a WiFi network called PEP
Step 2 Connect the WiFI Device to the Internet
In this portal, you enter the local WiFi network credentials in the Login Details tab to connect to the Internet and then press Save.
In step 4, you will need the number following the PEP or JRF in the upper right corner.
Step 3 Configure the Wi-Fi sensor or Gateway
a) On the JemRF device configuration website, after connecting the device to the local network, go to the “Sensor Config” tab and check the “Send To Server” box. Optionally you can change the sending interval time in the “Temperature send interval” field. Normal Send to Server is 300 seconds, it can be as often as 60 seconds and as long as you want. Finally, to save the data, press the Save button.
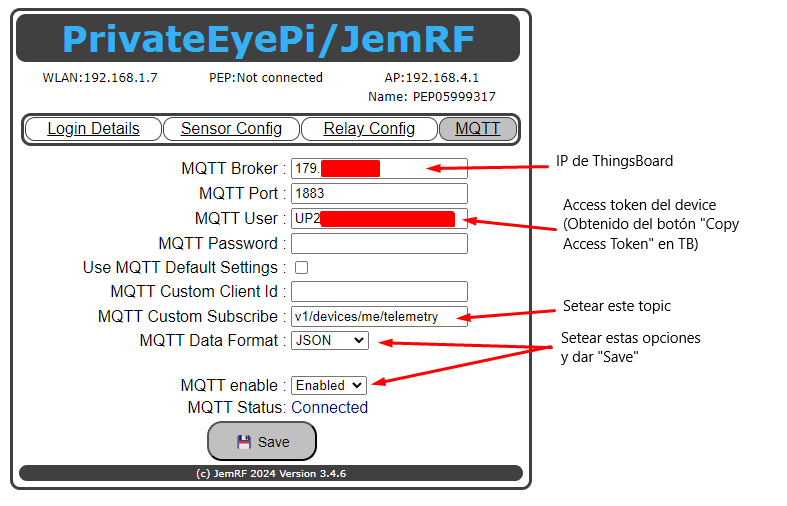
b) In the MQTT tab, you must enter all the necessary data to connect to the ThingsBoard MQTT broker and press the Save button.
Step 4 Setup ThingsBoard Device Profile panel
a) Under “Device Profile” you create a transport type of MQTT. Additionally, in the “Telemetry topic filter” field, you must add the identification number that the JemRF device concatenates to the end of the topic when sending data. 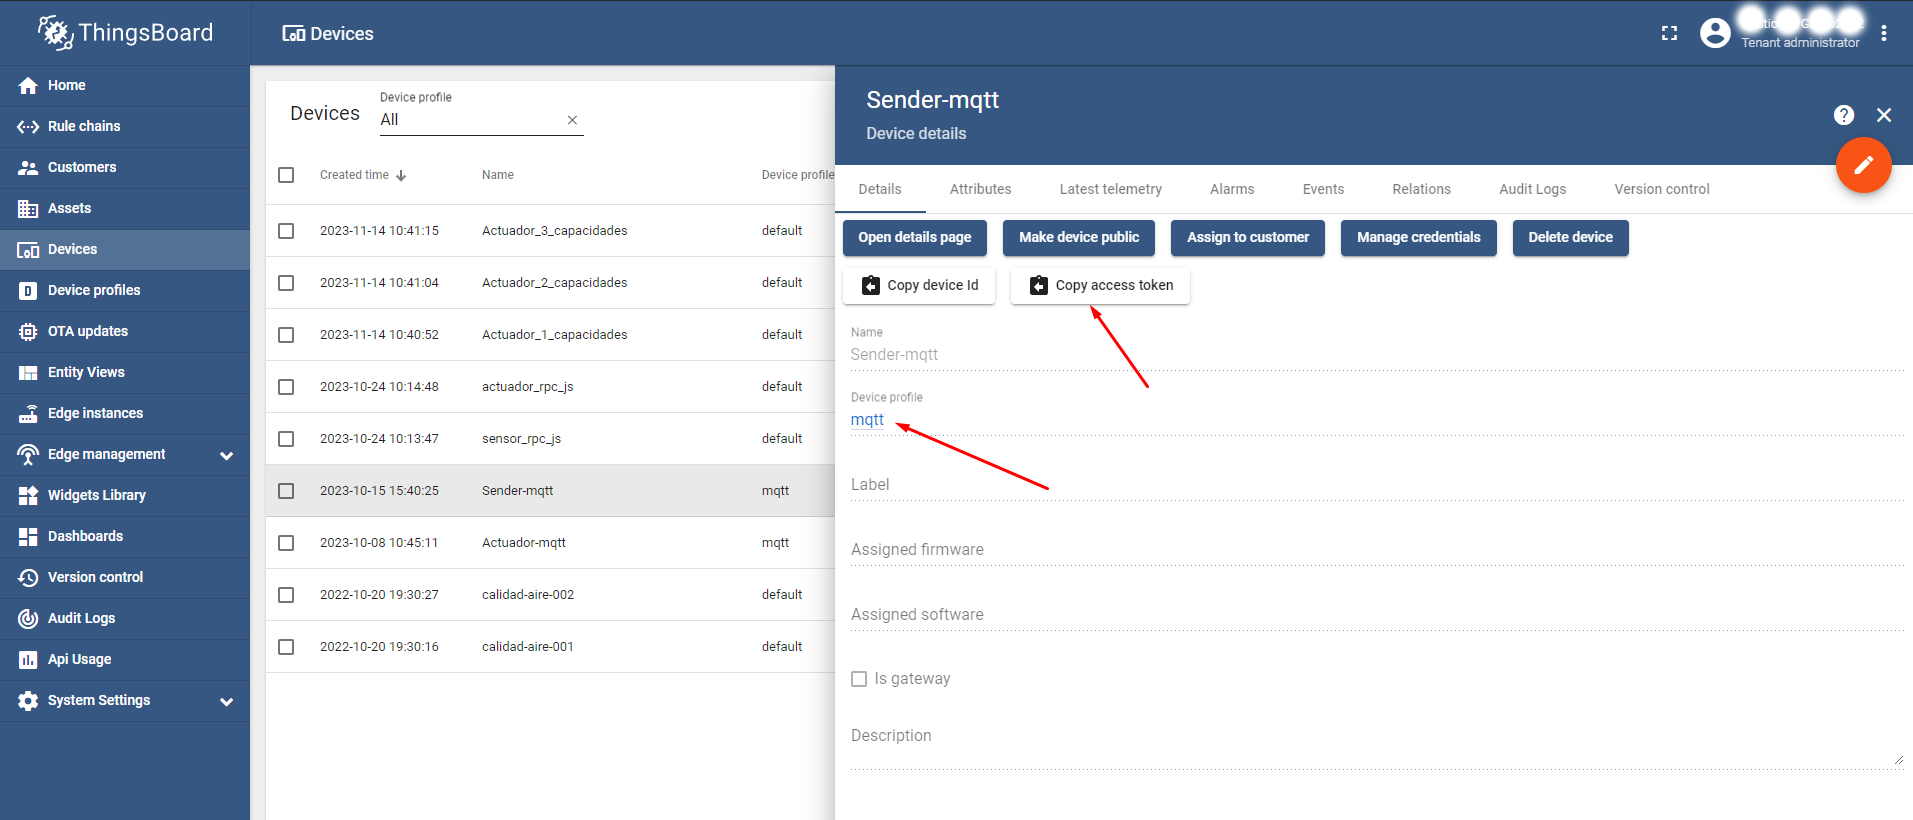
b) A new “device” must be created that has the new profile created set to it. On the other hand, the device token must be copied using the “Copy Access Token” button to use it in the device configuration in step 2) b).
c) Under Profile: Device Profiles create an MQTT Profile. Enter Name under Details. Next under Transport configuration shown in screenshot below, select Transport Type MQTT show at first Red Arrow.
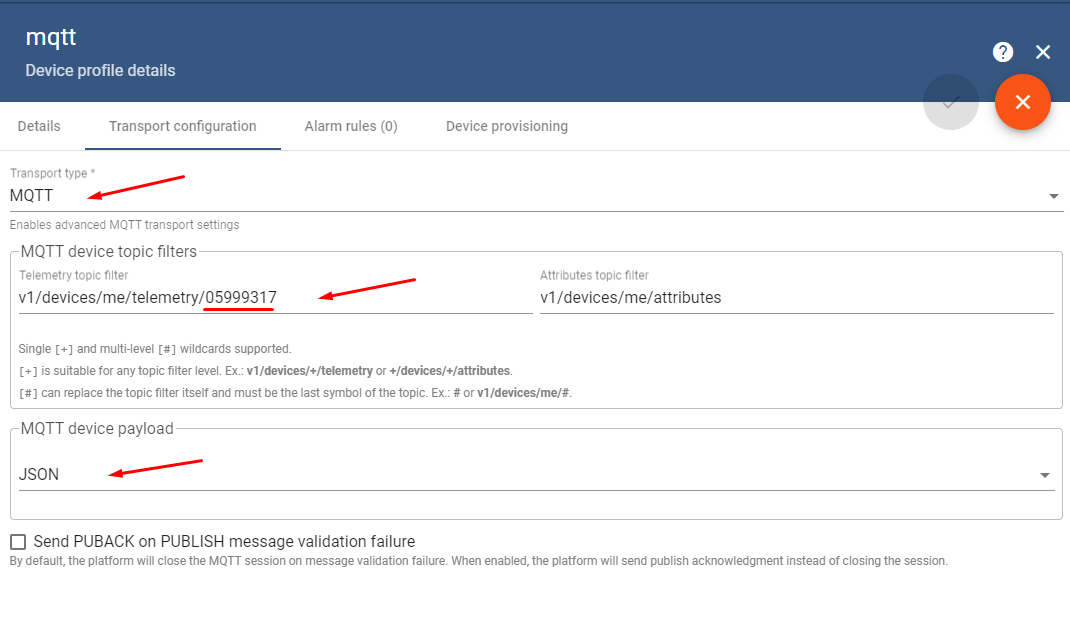
In the MQTT device topic filters, replace the ThingsBoard generated number after v1/devices/m/telemetry/(this will be a long key) with the WiFi Device Id as pointed to with the Second Red Arrow. If you are using a Temperature and Humidity Sensor use the device Id. The WiFi Device it is the name in the upper right “Name:”. As an example: PEP12621392 only use the numbers after PEP or 12621392 as the Device Id. If you are using a WiFi Sensor with one or more Temperature Sensors, copy the second part of Sensor ID show on the Sensor Config page like “DS18B20-8194224248” the device Id is “8194224248”.
The third arrow is to tell the board the data is in JSON format.
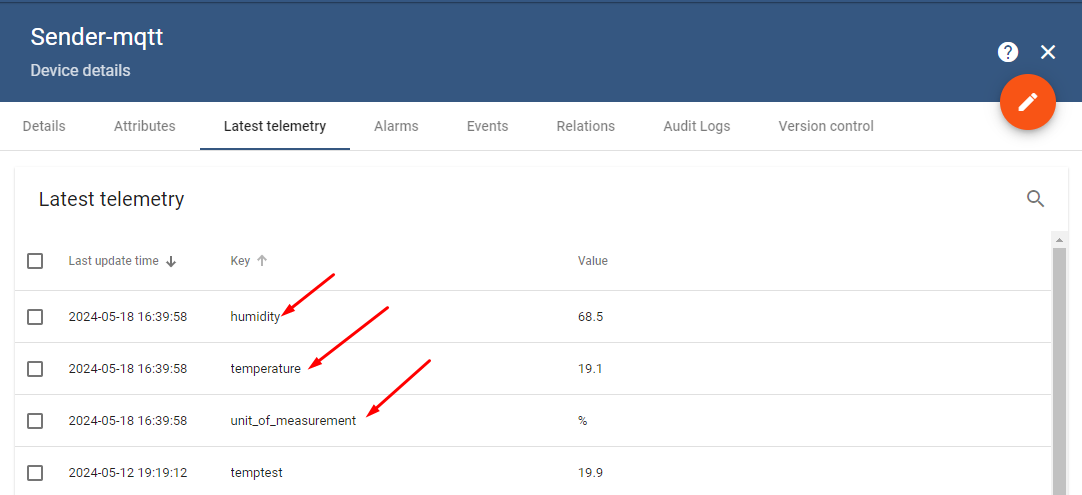
Step 5 Setup ThingsBoard Device Telemetry
Finally, if all is working, in the “Last telemetry” tab of the device in ThingsBoard, you will see the messages sent under the temperature, humidity, and unit_of_measurement fields.