Introduction
The WiFi Wireless Gateway (WiFi Gateway) receives messages from the Wireless sensors and sends them to the JemRF Monitoring service. This eliminates the need for a Raspberry PI computer and all that extra overhead. You can also connect to the our legacy service PrivateEyePi. The Gateway provides an easy to use tool to get your wireless sensors online free of configuring and programming a computer first.
Creating Monitoring Account First
If you are planning on using our newer monitoring services “monitor.jemrf.com”. It is recommended you create your Monitoring Account first if you don’t have one, because in Step of the Gateway Setup Details you will need to know your monitoring account token. If you do not have a JemRF Monitoring Service account, the sign-up instruction to create an account are at: Create account and create a Token.
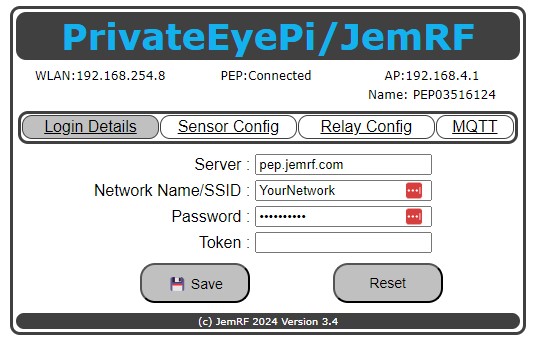
- For the legacy service, the sign-up instruction on PrivateEyePi are at: Create account and get Token. If you already have a PEP Token, you can use it on the newer JemRF Monitor service.
Setup Details
The configuration page for the WiFi Gateway is very similar to the WiFi IoT Sensor. You can configure the Wireless Gateway using any device that supports WiFi and an internet browser. In this example we will use a desktop computer.
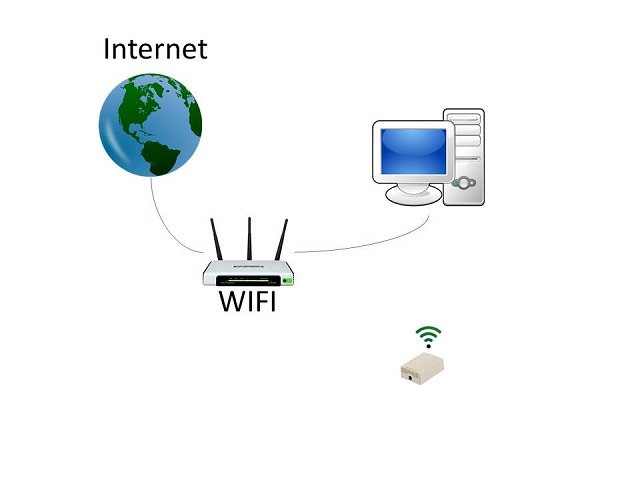
To make setup easy, the WiFi Gateway has its own Access Point.
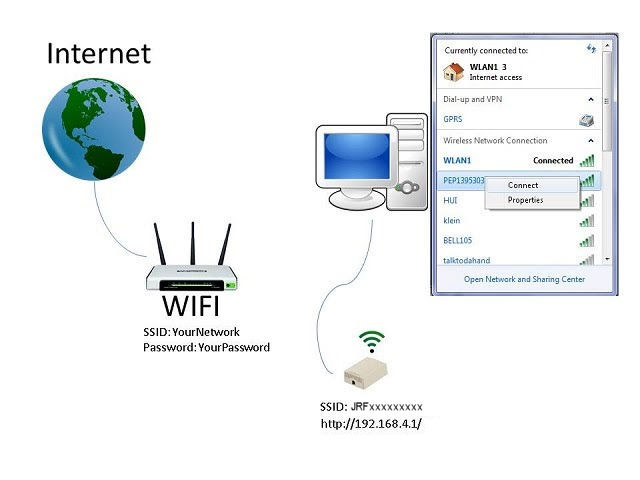
Step 1 Connect to WiFi
The first step is to connect your smart device to the WiFi Gateway. Power up the WiFi Gateway and using your computer (or smart device) look for a WiFi Name that starts with JRF followed by some numbers. These numbers are the unique ID of your device. Connect to the device using the default password:
Password: WiFirelay
Step 2 : Configure SSID and Password
Now open up a browser and navigate to http://192.168.4.1/.
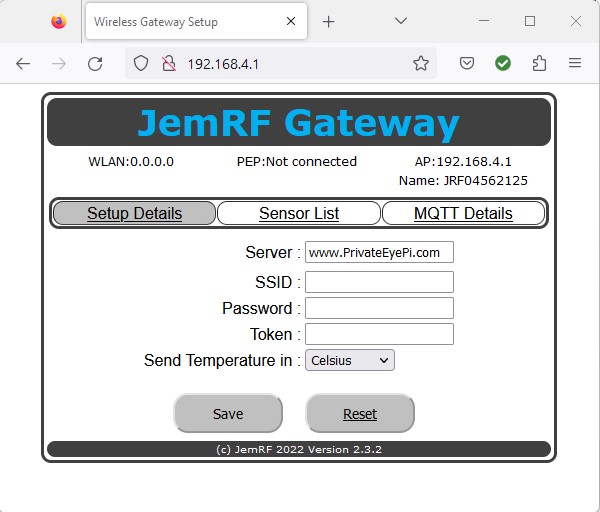
From here you configure your WiFi Settings.
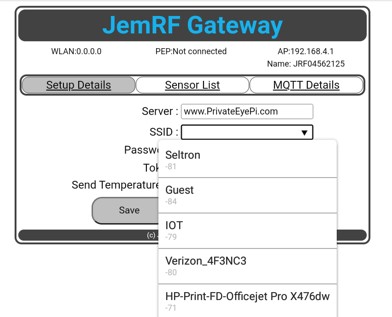
Next enter the 2.4G WiFi Network Name/SSID and Password of your WiFi router and click on save.
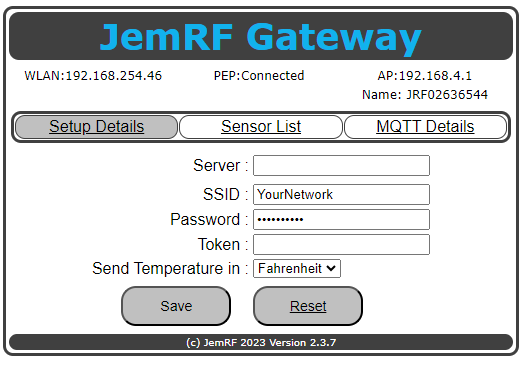
Wait a few moments for the WiFi Gateway to connect to the WiFi router. Click on the “Setup Details” menu option to refresh the screen. Once connected you will see the WLAN: IP address has given to the Wireless Gateway, as shown in the next image. In the example below it shows 192.168.254.46, yours will be different. What’s important is your gateway is now connected to the Internet.
Step 3 : Connect to Monitoring Server
You can now switch you laptop or phone from the device WiFi to your home WiFi Network. If you want to use our monitoring services,“monitor.jemrf.com” is our newer service, focused on monitoring with custom tolerance settings to trigger notifications to help alert when there is a problem. The next step is to connect your gateway our services so you can monitor the devices and get alerts. Both of our online services have a free tier. You are welcome to visit each to see which meets your needs and can sign up for both (only one will work at a time). Both use a token to link your device to your account.
Monitor.JemRF.com
If you want to use our monitoring services and you do not have a JemRF Monitoring Service account, the sign-up instruction to create an account on JemRF Monitoring are at: Create account and create a Token.
- For the legacy service, the sign-up instruction on PrivateEyePi are at: Create account and get Token. If you already have a PEP Token, you can use it on the newer JemRF Monitor service.
Step 4 : Final Gateway Settings
With your Gateway now online (has a WLAN number), you can stay on your home WiFi Network and point you browser to the WLAN address of the gateway. In the example picture above the 192.168.254.46 would be the WLAN address for my Gateway, your address will change. Go to http://WLAN (example http://192.168.254.46).
Server
Now on the WiFi Gateway Setup Details page, the Server setting is pep.jemrf.com.
Token
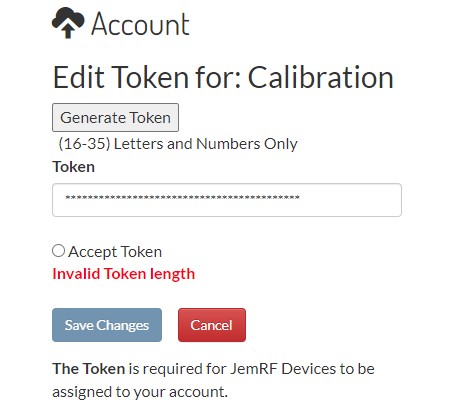
Using your account on monitor.jemrf.com, after you login, click on your name in the upper right hand corner a drop down menu will appear. Select Account and then click on the Edit Token button.
- If you have a PrivateEyePi token already you can paste it in the token field and click the Accept Token to validate it is unique and Save. Now the same token works for both servers.
- If you do not have a PrivateEyePi Token, click Generate Gateway Id and it will create a token for you.
Click the Accept Token to validate it is unique and Save.
Return to the Gateway WiFi and go back to 192.168.4.1 and copy and paste the Token into the Token field as shown in the below diagram:
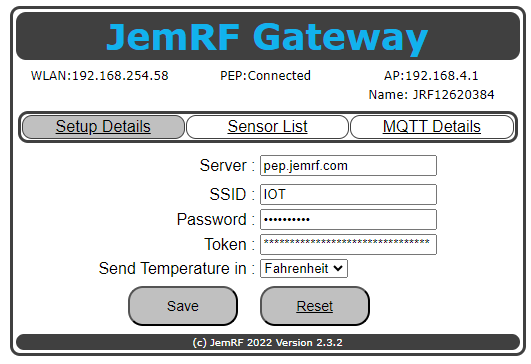
Clicking “Save” will connect the WiFi Gateway to the server. After a few moments, click on the “Setup Details” tab to refresh the screen, you will see “PEP: Connected” as shown in the image above.
Once Connected, the Wireless Gateway will start forwarding Wireless Sensor data to the monitoring server.
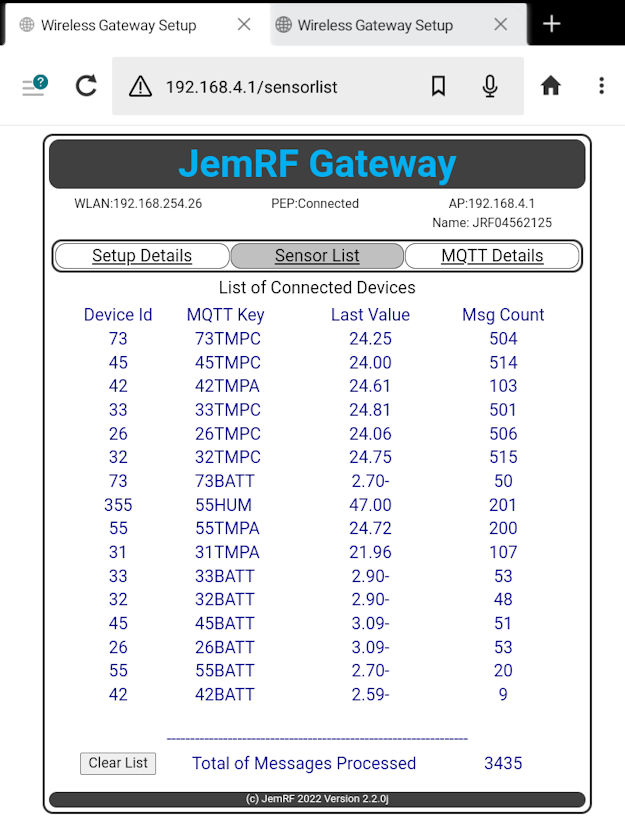
Sensors List
The Sensor List page shows the sensors that are connected to the gateway. You sensor will appear in the list once it is powered on and in range of the gateway. Range is 1m to 300m depending on walls and objects between the sensor and the gateway. The sensors in the list are the sensors the gateway is forwarding to your monitoring service dashboard. The list shows the last message from each sensor received by the gateway with how many messages have been forwarded for that sensor and a grand total of all the messages forwarded to the server.
The WiFi Gateway tracks messages for up to 64 Sensors.
There is also an option to set Sensors to a common send Interval at the bottom of the list. The value of 0 disables this feature.
This allows for setting the update interval of a Sensor when the sensor starts up. The Gateway detects the Sensor Started and sends it the Interval command.
Use case: You have several sensor sending updates at 1 minute, 3 minutes and 5 minutes. You would like them all to be sending at a 5 minute invterval. You would enter 5 in the Set Sensor Updated Interval and press Change. Then when you power cycle your sensors they will be changed to update every 5 minutes. The interval can be 1 to 30 minutes.