Remote switch
Description
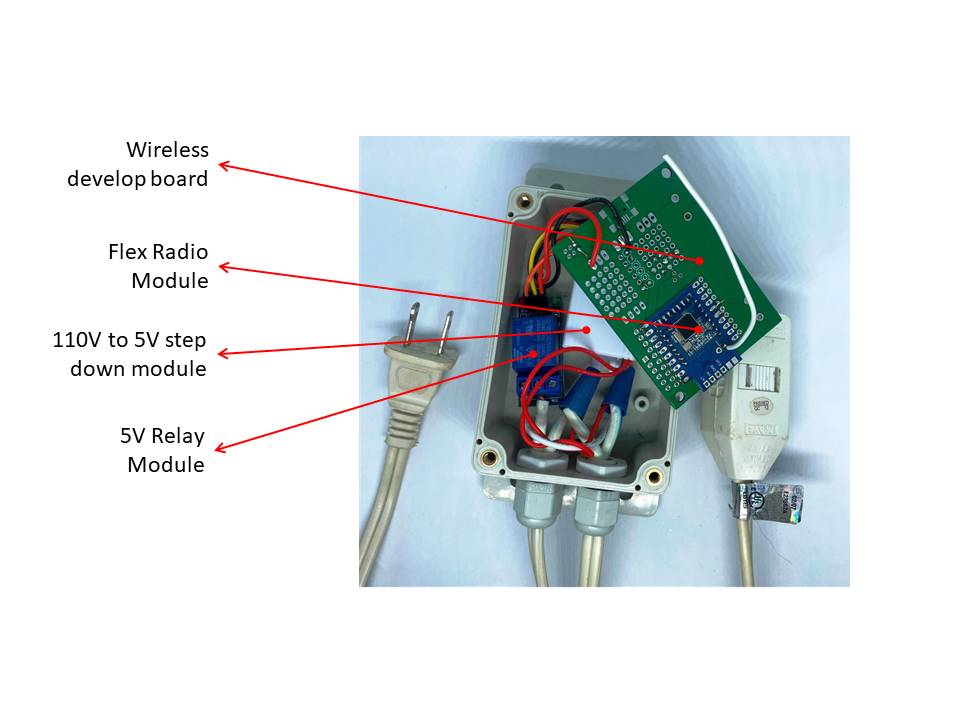
Below are some pictures of a remote switch project that is used to switch on/off whatever is connected to the power output of the extension power cable. The extension power cable has been cut in the middle and spliced with this remote controlled switch. Useful for controlling lights.
The case is a beautiful weather resistant and rugged project box with transparent case. Inside are a number of components described in the second picture and listed below.

Parts
- Case - Wireless Switch Tool Accessories Case Outdoor Cable IP66 Waterproof Junction Box For Lights Smart Home Practical Wire Connector. Aliexpress link.
- Flex Radio module.
- Wireless developer board.
- 110V AC to 5V DC step down.
- 5v to 3.3V step down.
- Relay Module.
- NPN222A transistor.
- 10k resistor.
- 2 connector screw terminals.
- A standard extension power cable that has been cut in half and wires stripped.
Wiring
This tutorial describes how to use the Flex radio module for remote control and how to construct the circuit. Note that some of the parts in the list above are not displayed in the above picture because the parts are on the underside or the developer board.
Application integration
See the integration section of the JemRF Documentation for details on how to integrate this remote switch with the application of your choice (e.g. Home Assistant, AdafruitIO, Blynk, PrivatetePi, Thingsboard etc…).
Code
See this example code for how to integrate this remote switch with Home Assistant. This will allow you to switch the device on/off from the Home Assistant dashboard and also create automations like switching a light on on sunset and light off on sunrise.